
Knowing how to resolve H202 error in QuickBooks can be challenging. Thanks to a plethora of solutions available for its fixation. But then what is the suitable solution for the Quickbooks enterprise error code h202 you frequently encounter?
In such a situation, it becomes essential to understand what QuickBooks error code H202 is all about and its causes. We will be discussing everything about this error in QuickBooks desktop before telling you instant solutions to resolve it.
Table of Contents
What Is Error H202 In Quickbooks?
You probably would have encountered an H202 error in Quickbooks when your QuickBooks while switching your QuickBooks application from a single-user mode to a multi-user mode. Basically, it means that the multi-user connection in your server computer is blocked.
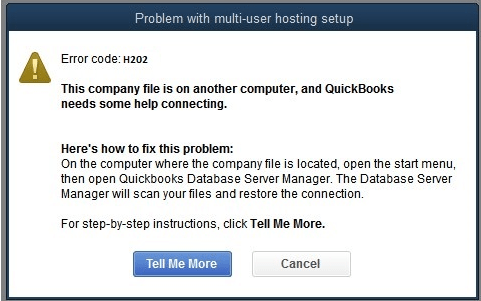
It plays an important role in storing QuickBooks company files. As a result, you aren’t able to access the QuickBooks company file. You will see the following Quickbooks h202 error message:
“This company file is on another computer, and QuickBooks needs some help connecting.”
Why Do you Encounter QuickBooks Error H202?
There can be a lot of reasons why you encounter QuickBooks error H202. So, before we tell you how to resolve H202 error in QuickBooks, you should know the reasons for its occurrence. Enlist4ed are a few of them:
- Due to a corrupted QuickBooks Database Server Manager
- Blocking of the communication path by the computer’s firewall system
- Invalid or damaged DNS settings
- When your system can’t connect to the server
- The hosting configuration settings are wrong
- Neither QBCF Monitor nor QuickBooks DBXX is running
- Files/files from the company are corrupt
How To Resolve H202 Error in QuickBooks?
There are different methods for various causes of Quickbooks Enterprise Error code H202. Are you now eager to know how to resolve H202 error in QuickBooks? Of course, you would be. Follow any of the below steps for troubleshooting this QuickBooks error code H202.
Solution 1: Check the Network Connectivity
As we said earlier, your might be facing a QuickBooks error code H202 due to some connectivity issues. Therefore, you need to test your network connectivity to resolve H202 error in QuickBooks. Apply the following steps:
- You will have to ping your server from each workstation to test the network connectivity.
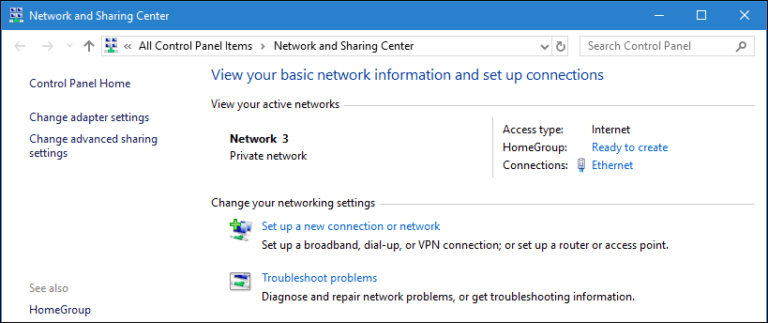
- Type Network and Sharing Center in the Windows search bar on the computer screen and open it.
- Choose the Change Advanced Sharing Option.
- You now have to turn on Network Discovery and File and Printer Sharing options.
- For getting the server name from your server, go to the start menu and type Run.
- After that, type “CMD” into the run window and press enter.
- Click Enter after typing “ipconfig/all” into the CMD window.
- On the screen, find the text Host Name, and to its right are the server’s details. Write down this Host Name somewhere.
- Go to the workstation for testing the server.
- Now, go to the Windows Start menu, and open Run.
- Into the Run window, type “CMD”
- Later, type “ping_[your server name],” and press Enter. Note: Make sure to type the server name excluding the brackets.
- Repeat the discussed steps on every workstation that shows H202 error in QuickBooks.
Solution 2: By Using The QuickBooks File Doctor Tool
- Go to the QuickBooks Tool Hub, and select Company File Issues.
- Click on Run QuickBooks File Doctor.
- From the drop-down menu, pick your QuickBooks Company File. Browse and search it if you didn’t find one.
- Click on Check your File and tap continue.
- Tap Next after entering your QuickBooks admin password. Let the QuickBooks File Doctor scan in and resolve QuickBooks error H202.
Also Read: How to Solve QuickBooks Backup Error: Unable to Backup Company Profile
Then Know: How to Solve QuickBooks Error 6147? (Simple Troubleshooting Steps)
Solution 3: By Deleting And Recreating The .ND File
The .ND files store the Network configuration of your QuickBooks application. You also face QuickBooks error h202 when these files get corrupted. Therefore, you can resolve H202 error in QuickBooks by using the below troubleshooting steps:
- Go to the Windows search bar and look for *.nd and tap Enter
- Delete the .nd file from the results
- Search on the windows search bar for *.nd and press Enter
- From the results, delete the .nd file.
- Locate All Programs > QuickBooks > QuickBooks Database Server Manager.
- Tap on the “Scan Folder” tab and then press the “Add Folder” button.
- Later, click on the OK button after browsing the company file.
- Click on Scan to begin the scanning process. Tap on Close.
Call Us For Instant Solution 8447363955
Solution 4: By Hosting The Company File On The Local Storage
Another way for troubleshooting H202 error in QuickBooks is by hosting the Company File on the local storage. Apply the following steps to resolve this QuickBooks error H202:
- In the QuickBooks application, use the F2 key for opening the Product Information screen.
- Tap Hosting to reflect “local files after you locate it in the lower-left corner just below the Local Server Information.
- Ensure that no other computer in the network is trying to access the same company file.
Solution 5: Check If Your QuickBooks Services Are Running
If the above steps do not fix QuickBooks error h202, you can check if your QuickBooks services are running or not. Follow the below steps to do it.
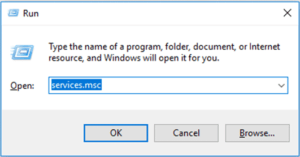
- Go to the Windows search bar and type Run.
- Now, type services.msc in the Run window and press Enter.
- From the service window, double-click on QuickBooksDBXX ( where XX is the QuickBooks version) in the list
- A QuickBooksDBXX properties window will appear. Choose Automatic as the Startup Type.
- If the service status is not set to running or started, then select start.
Solution 6: By Making A New Folder For the QBW file
The next must-try solution for resolving the H202 error in QuickBooks is by making a separate folder for the QBW file. Here is how:
- In the beginning, go to the server computer and then make a new folder.
- Moving ahead, you need to share the folder and configure the folden and Windows access permissions to share company files.
- Next, make sure you are copying the QuickBooks Database(QBW) file to the new folder.
- Finally, relaunch your company file in the multi-user mode.
Wrapping it up,
After reading this post, you finally know how to resolve H202 error in QuickBooks. And the credit goes to all the discussed solutions. Are you still facing problems solving Quickbooks enterprise error code h202? Well, feel free to call us.


