
You can save a lot of time if you import QBO file to QuickBooks Online. Do you know why? Well, you don’t have to add the items from your QuickBooks Banking data list one by one. It will happen automatically within a blink of an eye after migrating the QBO file to QuickBooks Online. Let’s dive in and check how.
Table of Contents
What is the actual meaning of the QBO File?
Before we tell you the steps for importing a QBO file to QB Online, it’s important to know about it. In short, a .qbo file is an electronic bank statement that you download from the financial institution’s website. It stands for QuickBooks Online Bank statement file and helps you in maintaining the following lists:
- Account List
- Customer Contact List
- Supplier Contact List
- Product/Service List
Let’s dig deep and check why importing a QBO file to Intuit QB Online is so essential.
Also Read: Everything You Must Know About Refundable Deposit in QuickBooks Online 2022
Must Check: How To Receive Intuit Payments with Credit Cards In QuickBooks 2022?
Why is it essential to import QBO File to QuickBooks Online?
Importing a QBO File to QuickBooks Online, it’s an unavoidable step that you might need to perform. And the reason is to get all the essential information while making a smooth transaction using the QuickBooks online application. Here are some more reasons why migrating your QBO file to online version of QB is essential:
- You can access your QB data from anywhere and anytime
- Save you from the hassle of adding the list elements manually
Easiest Steps to Follow For Importing A QBO File to QuickBooks Online
There are some steps you need to follow for migrating your QBO file to QB Online, such as:
Step 1: Sign in to QuickBooks Online

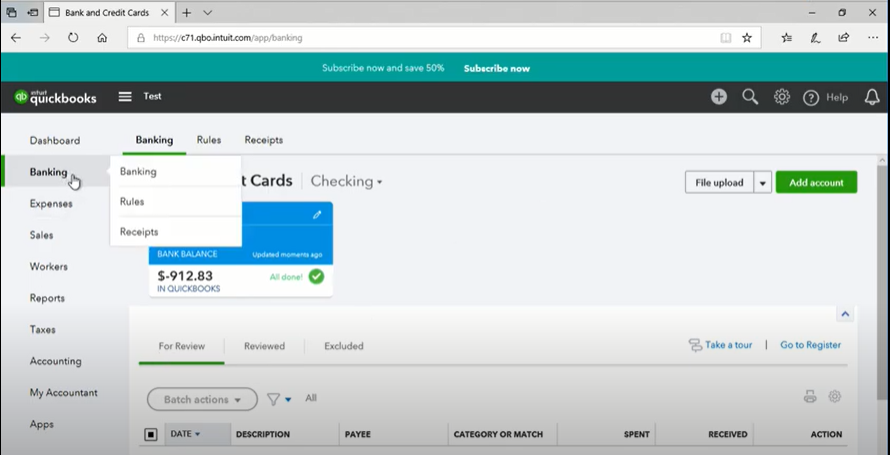
Initially, you need to login into the QB Online app for importing the QBO file. After that, tap on the ‘Banking’ option. Now, choose the account. If you haven’t created an account, make sure you are creating one.
Step 2: Hit on the File Upload button For Migrating The QBO File to QuickBooks Online

Once you open your account, the next step is to navigate to the ‘File Upload’ button. Make sure you are hitting on it, and then try finding the ‘Browse’ button. In the search area of the Browse section, look for the QBO file. When you find the QBO file open it by clicking on ‘Open’ and then press the ‘Next’ option.
Step 3: Review the QBO File after selecting it
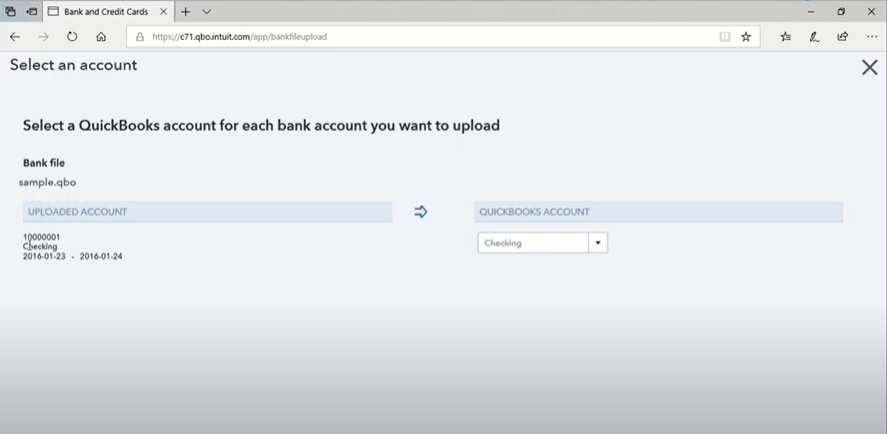
Another important step while transferring the data of your QBO file to the online version of QB is to review it. You need to ensure that you are reviewing the following things:
- Filename
- Account ID
- Account Type
- Date Range
After reviewing the above-mentioned data, your next step is to choose the QB Online account. It should be the one where you are thinking of importing the data.
Step 4: Modify the Settings in the Description column

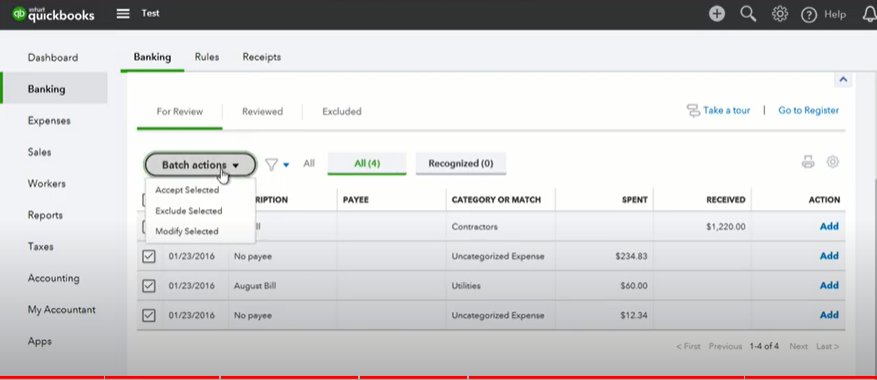
In the next step, find the ‘Description’ column and click on it. Moving further, go to the ‘Payee’ column and add all the transactions to the register. Later on, click on the ‘Batch actions’ option. It will allow you to easily import the data of your QBO file to QB online.
Wrapping it up:
Indeed, keeping the transaction records in QuickBooks Online can be easier if you import your QBO file to it. And after reading this blog post, you will be able to do it without any hassle. However, if you still feel clueless about how to import QBO file to QuickBooks online, feel free to connect with the QuickBooks support team.
